This blog post assumes a basic knowledge of Docker and Docker commands. It is intended to simply demonstrate the amazing world of Docker and how with only minimal coding and a few clicks we can spin up very powerful applications on the fly!
We are starting with a simple API using NodeJS and running on Express. This application simply lists some information about imaginary users in JSON format.
**index.js file**

const express = require('express')
const app = express()
const port = 3000

app.get('/', (req, res) => res.json([{
    name: 'Aaron',
    email: 'aaron@gmail.com',
    age: '99',
}]))

app.listen(port, () => {
  console.log(`Example app listening on port ${port}`)
})
Running this application returns a simple webserver that serves our content.

Lets take this simple API and Dockerize it! We will need to start with a Dockerfile. A Dockerfile lists directives and instructions for the docker engine to execute to create the container.
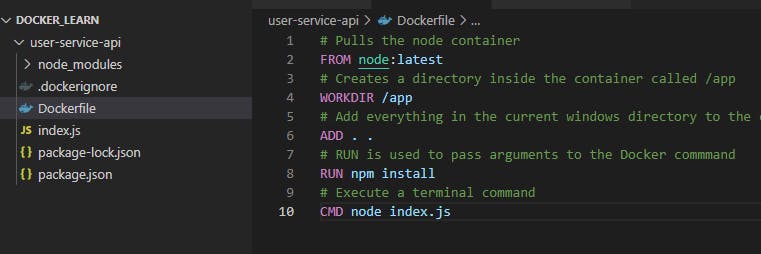
Here is our Dockerfile for this application. I have commented the code for clarity.
# pulls the node container
FROM node:latest
# creates a directory inside the container called /app
WORKDIR /app
# add everything in the current windows directory to the current docker directory (/app)
ADD . .
# RUN is used to pass arguments to the Docker commmand
RUN npm install
# execute a terminal command
CMD node index.js
And to build our new Docker container we will run
docker build -it user-service-api:latest .
Running the command you can see that all of our commands in the dockerfile are executed one by one. The docker engine downloads the latest version of node, creates a new directory inside the container and cd's inside, copies the contents of our web development folder to the container and then executes the javascript contained inside.

And now checking for our images we can see the image that we just created.

After creating a new image we can then run a container based on this image like this. The -p flag is used to bind the local port 3000 to the Docker container port 3000.
docker run --name user-api -d -p 3000:3000 user-service-api:latest
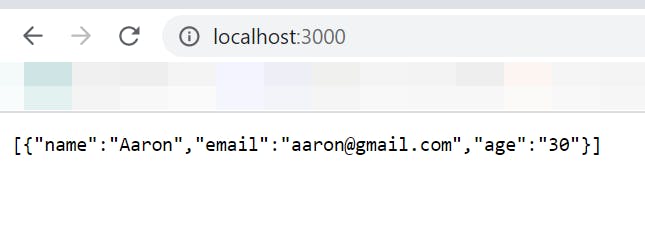
And now navigating to the browser at localhost:3000 and we will see our application!
DockerIgnore
There is one last thing that we need to understand and that is the Dockerignore file. The .dockerignore file is used to exclude files and folders from the build that are not important. Let's take a look at our build in Visual Studio Code. In our case, we do not need the folder node_modules so this can be excluded from the build. (The command RUN npm install will pull the node modules we need anyway.)

So to exclude file we create a file called .dockerignore and write inside what we want to ignore.
.************************dockerignore file************************

node_modules
Dockerfile
.git
Caching
Caching is a time saving mechanism that prevents Docker from downloading the same data repeatedly. By creating a dockerfile that only downloads dependencies if they change from a previous build then we can use caching to save time in builds.
# Pulls the node container
FROM node:latest
# Creates a directory inside the container called /app
WORKDIR /app
# This adds the dependency package to the build and only if the dependencies # have changed will docker reload them. This uses caching and saves time.
ADD package*.json ./
# Add everything in the current windows directory to the current docker directory (/app)
# ADD . .
# RUN is used to pass arguments to the Docker commmand
RUN npm install
ADD . .
# Execute a terminal command
CMD node index.js
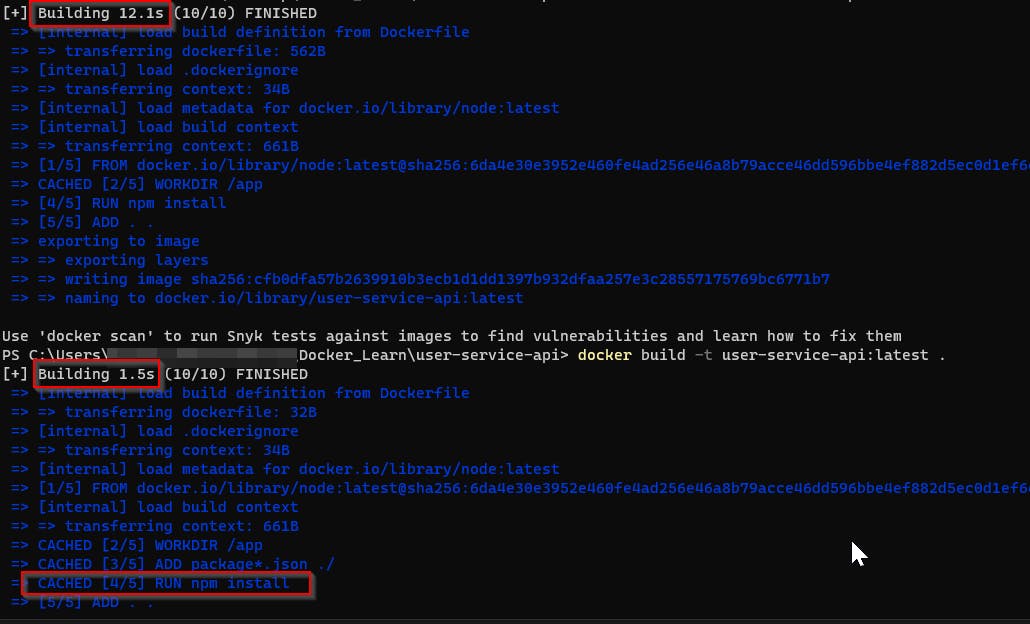
Look at the time difference after adding caching to our Docker build file. When the build was not using cached data then it took 12.1 seconds for our simple application. After implementing caching, however, the build time is down to 1.5 seconds!

That's all for today folks! I hope you enjoyed this little piece about the wonders of Docker as much as I enjoyed writing it! Till the next time 👋

